내가 만들고싶은 앱 1 - 숫자 더하고 빼기 1편
이전에 연습용으로 만들었던 TodoList App을 하나 만들었었다.
나름 괜찮지만 정말 단순하게 만들었다.

로컬도 저장이 가능하고, 디자인도 심플하게 해 놓은 상태다
그럼 이제 만들어야할 프로젝트를 준비하기 앞서 간단하게 정의를 해본다
1. 숫자를 적어서 더해준다.
2. 숫자를 적어서 빼준다.
3. 고정된 숫자 리스트 몇 개를 만든다.
4. 모든 데이터는 로컬디바이스에 저장이 되어야 한다.
우선 만들어보자.
npx react-native init CalcPrj
리액트 문양도 참 이쁘게 만든 거 같다.
프로젝트가 실행되면 폴더로 이동해서 다음과 같이 실행시켜 보자.
npx react-native start

i
디자인은 재능이 아니라면 항상 어렵기 때문에 일단은 잘 만든 프로젝트를 참고해 가면서 만들어보는 것도 좋다고 생각한다.
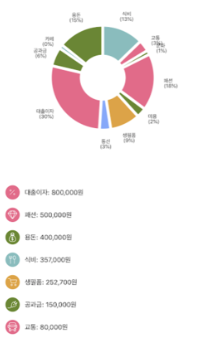
잘 안 보이지만, BuBoo라는 어플의 모습이다.
이런 식으로 표현하는 것도 좋다고 생각이 든다.
추가적으로 어떤 숫자를 적고 고정된 숫자도 만들어야 하고 (환경설정같이 고정숫자 만들어줘야 함)
그 숫자를 입력하고, 더해주고 빼주는 아주 간단한 계산기 같은 어플 구성이 되지 않을까?
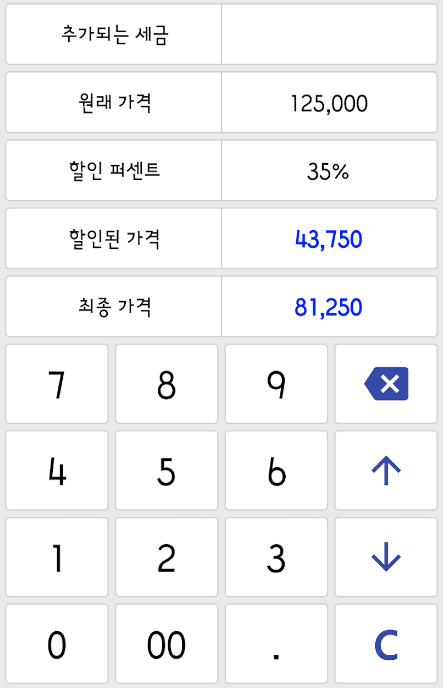
이 디자인은 똑똑 계산기라는 어플에서 가져왔다.
여하튼 이런 방식의 디자인으로 구성을 해볼 예정이다.
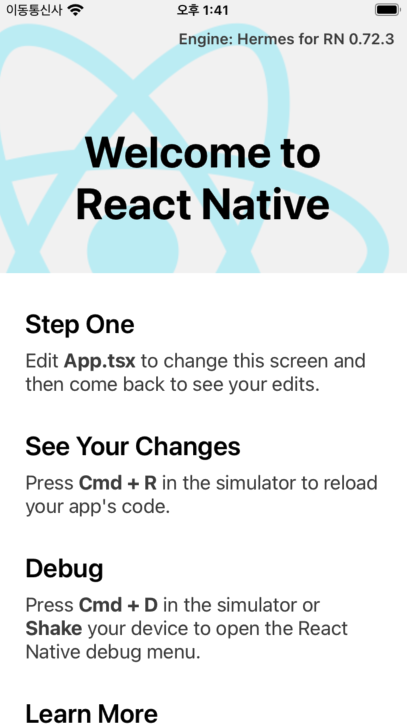
프로젝트가 이제 구성이 완료가 되면 아이폰 창 하나에 저렇게 뜰 것이다.
(안뜬다면 Xcode나 기타등등 세팅이 안된거니까 세팅하고 시작하자.)
다시 소스코드로 돌아가서 프로젝트의 App.tsx 파일을 확인해보면 기본적으로 뭔가 많이 작성해주었다.
/**
 * Sample React Native App
 * https://github.com/facebook/react-native
 *
 * @format
 */

import React from 'react';
import type {PropsWithChildren} from 'react';
import {
  SafeAreaView,
  ScrollView,
  StatusBar,
  StyleSheet,
  Text,
  useColorScheme,
  View,
} from 'react-native';

import {
  Colors,
  DebugInstructions,
  Header,
  LearnMoreLinks,
  ReloadInstructions,
} from 'react-native/Libraries/NewAppScreen';

type SectionProps = PropsWithChildren<{
  title: string;
}>;

function Section({children, title}: SectionProps): JSX.Element {
  const isDarkMode = useColorScheme() === 'dark';
  return (
    <View style={styles.sectionContainer}>
      <Text
        style={[
          styles.sectionTitle,
          {
            color: isDarkMode ? Colors.white : Colors.black,
          },
        ]}>
        {title}
      </Text>
      <Text
        style={[
          styles.sectionDescription,
          {
            color: isDarkMode ? Colors.light : Colors.dark,
          },
        ]}>
        {children}
      </Text>
    </View>
  );
}

function App(): JSX.Element {
  const isDarkMode = useColorScheme() === 'dark';

  const backgroundStyle = {
    backgroundColor: isDarkMode ? Colors.darker : Colors.lighter,
  };

  return (
    <SafeAreaView style={backgroundStyle}>
      <StatusBar
        barStyle={isDarkMode ? 'light-content' : 'dark-content'}
        backgroundColor={backgroundStyle.backgroundColor}
      />
      <ScrollView
        contentInsetAdjustmentBehavior="automatic"
        style={backgroundStyle}>
        <Header />
        <View
          style={{
            backgroundColor: isDarkMode ? Colors.black : Colors.white,
          }}>
          <Section title="Step One">
            Edit <Text style={styles.highlight}>App.tsx</Text> to change this
            screen and then come back to see your edits.
          </Section>
          <Section title="See Your Changes">
            <ReloadInstructions />
          </Section>
          <Section title="Debug">
            <DebugInstructions />
          </Section>
          <Section title="Learn More">
            Read the docs to discover what to do next:
          </Section>
          <LearnMoreLinks />
        </View>
      </ScrollView>
    </SafeAreaView>
  );
}

const styles = StyleSheet.create({
  sectionContainer: {
    marginTop: 32,
    paddingHorizontal: 24,
  },
  sectionTitle: {
    fontSize: 24,
    fontWeight: '600',
  },
  sectionDescription: {
    marginTop: 8,
    fontSize: 18,
    fontWeight: '400',
  },
  highlight: {
    fontWeight: '700',
  },
});

export default App;
필요한거만 냅두고 나머진 지워주자.
import React from 'react';
import {ScrollView, StyleSheet, Text, View} from 'react-native';

function App(): JSX.Element {
  return (
    <View>
      <Text>테스트</Text>
    </View>
  );
}

const styles = StyleSheet.create({

});

export default App;
심플해졌다.
어플 화면도 저렇게 심플해졌다.
테스트가 맨위 상태창과 겹치지만 바꾸면 그만인지라 잘 작동하는지만 확인하면된다.
이제 개발할 준비가 되었고,
다음 글에서 디자인구성부터 시작할 예정이다.
'DEV > React-Native' 카테고리의 다른 글
| 내가 만들고싶은 앱 1 - 숫자 더하고 빼기 2편 (0) | 2023.07.17 |
|---|---|
| npx react-native init 실행 시 cli.init is not a function 에러 (0) | 2023.07.10 |
| React native - AsyncStorage 사용방법에 대해서 정리 (0) | 2023.07.10 |
| React Native 빌드 시 SHA-1 for file … is not 문제 해결방법 (0) | 2023.07.09 |
| react native apk 세팅 및 추출 방법 정리 & app icon 만들기 (0) | 2023.07.09 |